
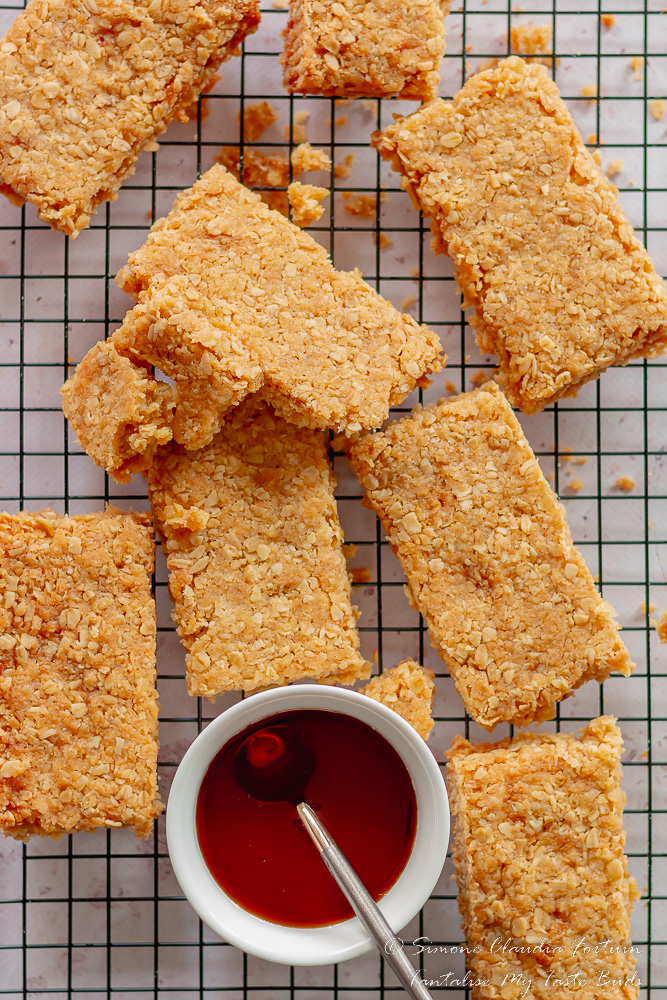
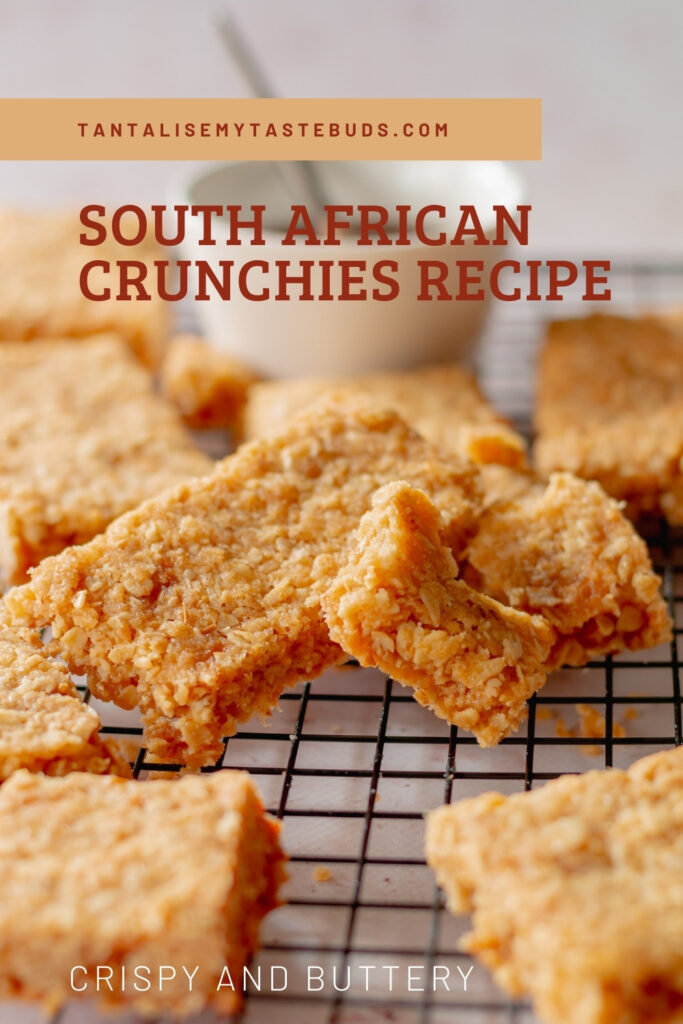
This home made South African Coconut and Oat crunchy biscuits recipe makes golden bars of buttery, sweet, crispy deliciousness that is best enjoyed with a cup of milk for breakfast or with tea for a mid-morning or afternoon pick me up.
Growing up, my aunt Josephine’s oat crunchies biscuits recipe was a staple that she always made for special occasions and family gatherings. For as long as I can remember it has been one of our family favorite crunchy oat biscuits, and nothing I’ve tasted elsewhere even comes close to the snap and moderately sweet golden syrup flavor.
Her oat crunchy biscuits are so easy to make and even easier to eat that you can make up a batch any time.
One of my colleagues at work has claimed that these oat crunch biscuits are addictive because once you’ve had one, you only want more and more. Homemade oat crunchies is one of those easy to make South African snacks that you wonder why it’s taken you so long to make it for yourself.
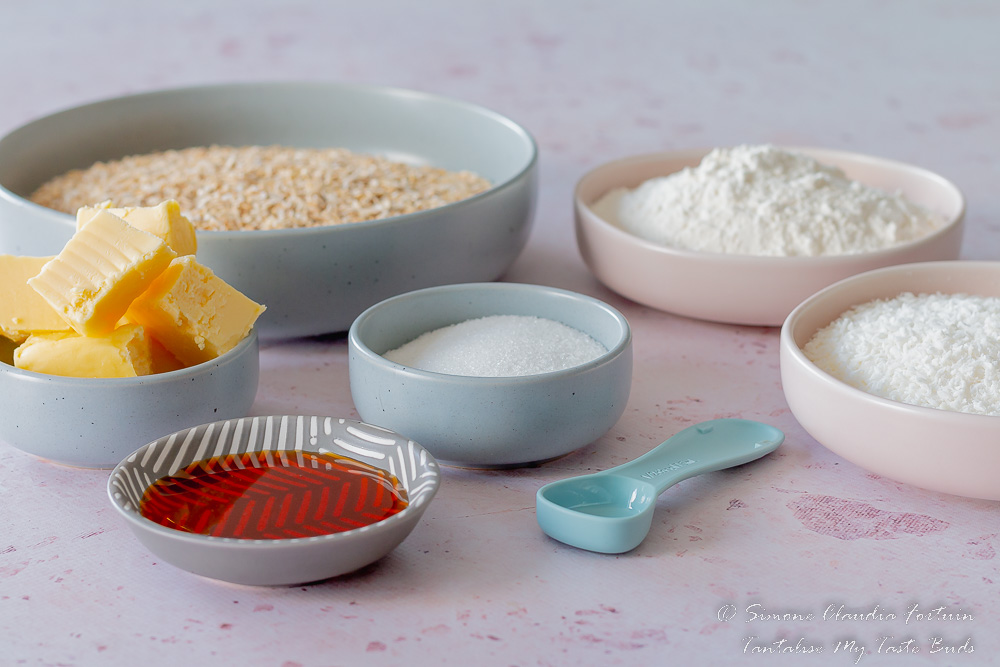
The oat crunchie recipe ingredients are remarkably ordinary. Rolled oats, coconut, fine granulated sugar and flour are moistened with melted butter, golden syrup and bicarbonate of soda. After baking, the end result is extra-ordinary. The aroma of the butter and syrup cooking together is heavenly and it becomes even more delectable as it hits the oats and coconut during baking. Your home will smell amazing!
When I lived in the UK I once bought something called flapjack, while I waited to take a train home from work. It looked like a South African cookie but the flavor and texture were disappointing. I never did acquire the taste for the soft, chewy flapjacks and much prefer our South African oats crunchies biscuits.

How to make crunchy oat biscuits
- Use good quality lightly salted butter.
- Use thick spoonable Golden Syrup, not the runny kind.
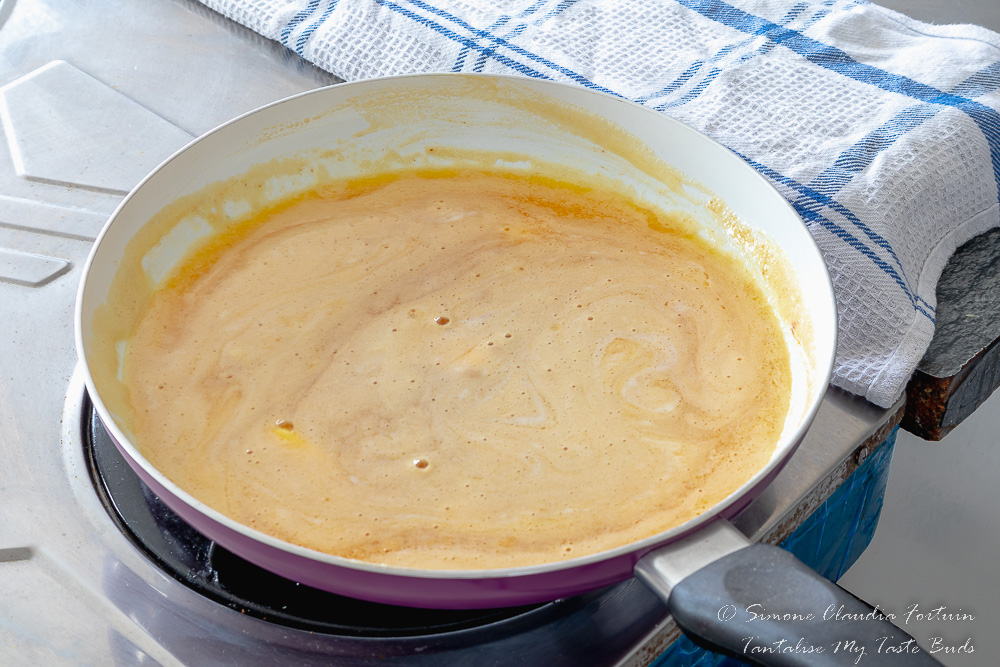
- Don’t let the butter and golden syrup boil with the bicarb for longer than a minute as it affects the color of the end result and makes it dark instead of golden.
- You may be tempted to bake the crunchies for longer than 20 minutes before cutting, but don’t do it. Baking for too long will make it too dry and crumbly and difficult to cut and flip.
- Always flip the cookies after slicing and return to the oven to ensure the bottom is crispy as well. To make this easier, place another cookie sheet of the same size or larger, over the cut cookies and flip it over. Separate the cookies and place the sheet back in the oven to finish crisping up.
- Allow the cookies to cool completely before packing away. That’s if you can resist snacking on them.


The first time that I made Aunty Josie’s oat crunchy biscuits recipe in Dubai, was for a year end afternoon tea that I was hosting for my department. Aside from coconut and oat crunchy biscuits, I also made a few other recipes that you can find by clicking the links below.
- Whipped Yogurt Mousse
- Caramel Peppermint Dessert
- Pecan Snowball cookies
- Decadent Chocolate cake with ganache
- Carrot and beetroot cake


Coconut and Oat Crunchy biscuits recipe (Crunchies)
Ingredients
Dry ingredients
- 120 grams medium dessicated coconut approximately 375 ml or 1 1/2 cups
- 210 grams cake or fine sponge flour approximately 375 ml or 1 1/2 cups
- 300 grams fine granulated sugar approximately 375 ml or 1 1/2 cups
- 270 grams rolled oats approximately 750 ml or 3 cups, not easy cook or quick cook oats
Wet ingredients
- 440 g cold butter cubed
- 30 ml Golden Syrup 2 tablespoons, I use Lyle's as it is thick and gooey
- 2 ml bicarbonate of soda less than 1/2 tsp
Instructions
- Heat the oven to 170C or 150C fan / 340 F / Gas mark 3.
- Combine the coconut, cake flour, sugar and oats in a heatproof bowl and whisk a few times.
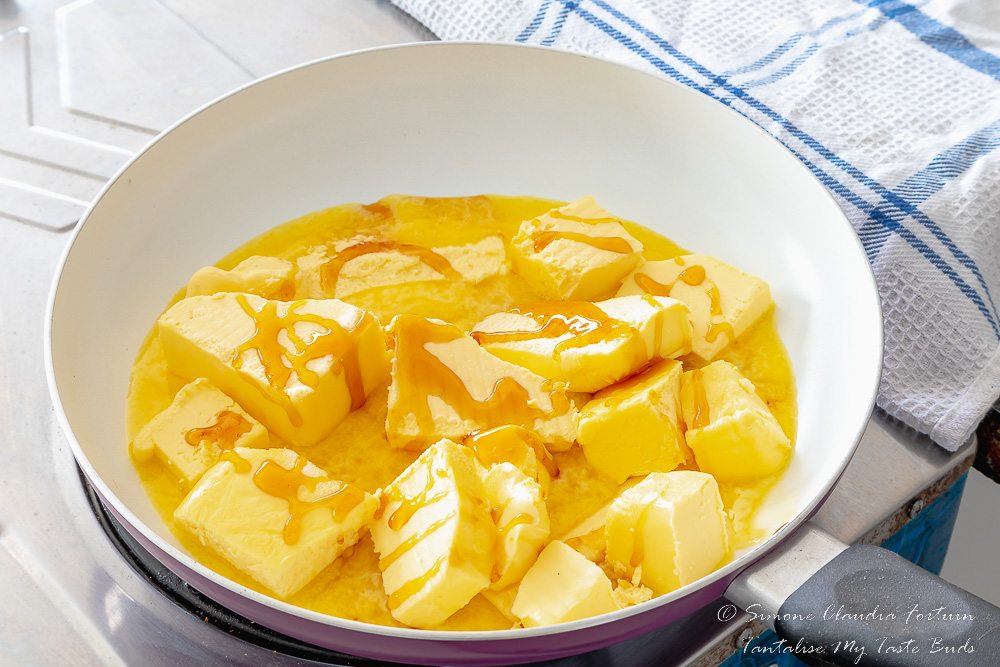
- Heat the butter and golden syrup in a medium size pot on medium high, then add the bicarbonate of soda when the butter mixture starts bubbling.
- Allow the mixture to bubble for exactly one more minute, then add the hot liquid to the dry ingredients. (I time this to ensure the bicarb doesn’t make the end result too dark).
- Mix the ingredients thoroughly until the flour is incorporated and the oats and coconut are evenly coated.
- Empty the cookie mixture into an oven tray and ensure it is smooth, even and compact. You can use the bottom of a flat measuring cup to do this.
- Bake for 20 minutes, then remove from the oven and cut into squares or fingers. To make this easier, place another cookie sheet of the same size or larger, over the cut cookies and flip it over.
- Separate the cookies and place the cookie sheet back in the oven to continue to bake on the other side for another 10 minutes to crisp it up.
- Remove from the baking sheet and let cool completely on cooling racks then pack into a pretty airtight cookie jar or tin.
Nutrition
Disclaimer: Nutritional information for the recipe is an approximation and varies according to the ingredients and products used.
If you liked the recipe above please consider rating the recipe and leaving a comment below. Also keep in touch on Facebook, Twitter, Pinterest and Instagram for more updates.
Don’t forget to share the recipe with your family and friends and #tantalisemytastebuds if you share one of my recipes that you made on Instagram!
Want more? To get new recipes delivered straight to your inbox, join our club and subscribe to Tantalise My Taste Buds.

I used to make these all of the time, years ago. The recipe was given to me from a friend in Zimbabwe. I never saved the recipe. So happy to have found it again. Still looking for one more recipe. It was ground beef, eggs, milk, bread, curry, turmeric, sultanas….. do you know the recipe?
The ground beef one sounds like bobotie….
Hi Razena, what is the size of the oven tray you use?
And how big do you cut the squares into? Im am very keen to try your recipe-I have been trying out crunchie recipes to match my favourite store bought cookies without success. Your tips and comments make a lot of sense.
Hi Maritza
I will update the measurements for the baking sheet as soon as I reach home. The size of the squares usually depends on the length and width of my tray. I tend to eyeball how many rows I can cut lengthwise and then cut across the number of rows that will give me roughly square shapes. Simone has done this in rectangular shapes and those look lovely if you want to dip one end in chocolate or pack them up in goodie bags.
Assalaamu Alaikum Razena
I find it a bit confusing why the butter should be cold cubed but it’s going to be heated untill bubbling. I’ve made this from another recipe which used 1 cup of all and 125g butter I did however swop half of coconut for nuts but the end result wasn’t hard enough to my liking because I thought it would be much crunchier
I’m going to try your measurements, will still swop for some nuts too but your increased butter will help definitely make it crispier in-sha-Allaah
Shukran for sharing
Wa alaykum salaam wa rahmatullahi wa barakatuhu.
I find that using cold butter in a recipe that requires it to be melted gives a completely different end result to using soft or room temperature butter. It has a less greasy feel when the other ingredients are mixed in and cooked, especially since it does use so much of it.
With respect to the other recipe, swapping out some of the coconut for nuts would probably have caused the issue. The more coconut you add the crispier the end result but if you add too much it will be dry. You could try using the same amount of coconut as specified in the recipe and still add the nuts. Unless the nuts are finely milled they won’t suck up any moisture.
I made these for a work function and now South African cuisine is famous in the Netherlands.
Will probably use a bit less butter next time but I like being a little flexible on the recipe.
I find that it is best to use really cold butter for this recipe. Soft butter tends to make it feel a bit greasy.
Delicious but had to bake it much much longer than instructed. Also struggled to cut it as it came out of oven- very fragile. Would rather cut it once slightly cooled.
Thanks for the feedback Carine.
These look delectable and so easy to make . I am definitely going to try them.
They are definitely so worth it!
Really nice and easy recipe. Had to bake for much much longer, maybe the butter is too much. Also couldn’t cut them and flip them. They would just break apart. But really tasty.
If you bake them too long they do become too hard and crumbly when they cool. The trick is to follow the recipe and remove after 20 minutes. Slice then cool and flip and bake on the other side as indicated to crisp up.
These sound so delicious indeed. I love how easy they look to make and the calorie content is also quite low. Brilliant recipe!
Not completely guilt free as it contains butter and golden syrup but it is still a good source of nutritious energy.
Those bars look really yummy. I as usual like the nutritional facts that u mention. I am not in country now else I would have taken the recipe to make it.
You can always print the recipe once you are back home and in your own kitchen 🙂
Wow, this cookie recipe looks really delicious and looks so easy to prepare. I will try to make this for my kids, thanks for sharing!
This was hands down my favorite when I was a child so I’m sure your kids will love them too. Let me know what they think when you do 🙂
Ooh! Those bars look oh so good. I’d love to try to make them for my family for a quick breakfast on the go!
I made this for a party at work a few years ago and one of my colleagues said these cookies are totally addictive because after having one he wanted to keep eating them 🙂